When Charly was just a baby we started a fun yet very simple Easter week tradition. We start on Palm Sunday and talk/read about what happened each day the last week of Christ's life. We also enjoy finding
videos about those same stories. And
there is this Because of Him Easter site that was started this year that we have already been using.
Then on the evening of Good Friday we like to have a meal that may have been similar to what Jesus may have had for passover. We even sit on the floor to eat it. The kids love this simple little tradition.

Our meal typically consists of a lentil dish, dried fruit and nut mix, flat bread, hummus and grape juice. So simple but the kids look forward to it every year and always ask if we are going to do it again!
On Saturday the kids get a few fun small healthy "treats" in their Easter baskets. Usually there is something very practical like socks or flip flops and books. And then sometimes a very small toy like a yo-yo or lawn darts or something fun like that.
We hunt eggs and spend the day together and try to spend as much time together with family as we can. On Easter Sunday we go to church some of us sing in the choir as part of the Easter program. Then more often then not we have a spring type picnic meal with extended family and just enjoy being together and being grateful for our Savior.
Curried Lentils Over Rice
1 large onion, chopped
4 medium carrots, chopped
2 cloves garlic, minced
2 Tablespoons Olive oil
4 Tablespoons Curry Powder
3 cups brown or green lentils
6-8 cups water, divided
1 1/2 cups
hummus
1 heaping teaspoon Vegetable Broth Powder
1 teaspoon Real Salt or to taste
pepper to taste
3-4 green onions, sliced
1 lemon cut into 8 wedges
cooked brown rice
Crock pot instructions:
In a warm crock pot, place the first 5 ingredients stir well and let warm up while preparing the rest of ingredients. Add lentils and 6 cups of water. Let cook on high for 3 hours or until lentils are tender. Add hummus, broth powder, salt and pepper and add more water to get desired consistency. Season to taste turn down crock pot and keep warm until ready to serve. Top with green onion just before serving. Serve over bowls of cooked brown rice, squeeze a wedge of lemon over each serving.
Stove Top instructions:
In a large pot heat olive oil then saute onion, carrots and garlic together. Add Curry powder and stir just until fragrant. Add lentils and 6 cups of water. Cover and let simmer for about 20-30 minutes or until lentils are done. Add hummus, broth powder, salt and pepper. Add more water if needed for desired consistency. Turn down to low and let heat through, stirring frequently. Season to taste. Top with green onion just before serving. Serve over bowls of cooked brown rice, squeeze a wedge of lemon over each serving.
recipe adapted from Curried Lentil Soup
You will find my Totally Homemade Hummus recipe here.
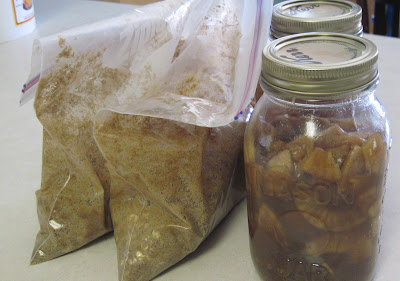
Dried Fruit and Nut Mix
50% dried fruit
50% nuts
I just make a mix of about 50/50 dried fruit to nuts. I like to use what maybe would be maybe more traditional foods and that we don't very often eat in our other nut mixes. For fruit I will do figs, dates, raisins, apricots. Sometimes I will do dried cherries and cranberries. Usually I try to work with what I've already got. For the nuts I like to use walnuts, pecans, almonds and sometimes hazelnuts and pistachios.
Flat Bread
You can take about any dough and roll it into the flat shape you want and cook it like a pancake in a hot oiled pan or griddle. I have used
My Best Yet Whole Wheat Bread recipe for this (I know not very traditional with the yeast and all;) or even
this tortilla recipe just not rolled so thin would work.
This year though, since I have
a sourdough start I am going to try a sourdough flat bread recipe. I have tried a few and they have all been eaten up but I haven't been super excited about any of them. So instead of posting an actual recipe I found
this very cool sourdough flat bread link up that looks like it has lots of fun options. I'm going to choose one of those or a mixture of a few of them. ;) Hopefully I'll find something we love.
Rejoice for He is Risen and have a very Happy Easter!


